DeployingVMware ESX
You've gone through the planning process. You've decided on VMware ESX as your platform, you've selected a supported server model and configuration, you've determined how you're going to handle the storage requirements, and you have an idea how you'll integrate everything into your existing network infrastructure. Now comes the time to install. To be honest, installing ESX is the easy part. Installing ESX can be done in a graphical mode or a text-based installation, which limits the intricacy of the screen configuration during the installation. The graphical mode is the more common of the two installation modes. The text mode is reserved for remote installation scenarios where the wide area network is not strong enough to support the graphical nature of the graphical installation mode.
VMware ESX offers both a DVD-based installation and an unattended installation that uses the same kickstart file technology commonly used for unattended Linux installations. In the following sections, I'll start by covering a standard DVD installation, and then I'll transition into an automated ESX installation.
Partitioning the Service Console
Before you install VMware ESX, you need to complete one more planning task, and that is planning your Service Console partitions. Remember from earlier that ESX uses a Linux-based Service Console (also referred to as the console operating system, console as, or COS) as the interface to the user. The core hypervisor, VMkernel, is not Linux-based but uses the Linux-based Service Console to provide a means whereby users can interact with the hypervisor. Because it is based on Linux, it uses Linux conventions for partitioning.
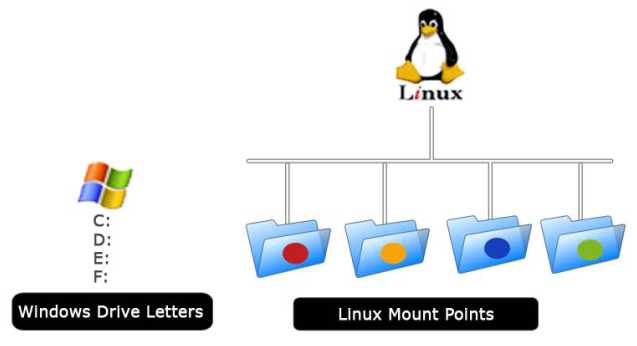
Unlike Windows, Linux (and by derivation, the ESX Service Console) doesn't use drive letters to correspond to partitions on the physical disks. Windows uses a multiroot file system, whereby each partition has its own root. Think of c: and D: -each drive letter represents its own partition, and each partition has its own "top-level" directory at the root of the drive. Linux, on the other hand, uses a single-root file system, where there is only one root. This root is denoted with a slash (I). All other partitions are grafted into this single namespace through mount points. A mount point is a directory (like /opt) that is associated with a partition on the physical disk. So, in a Linux environment, every directory starts at the same root. This creates paths like /usr/local/bin,
/usr/sbin, or /opt/vmware.
Any directory that isn't a mount point becomes part of the same partition as the root directory, so if there isn't a partition mounted at /home/s lowe, then that directory is stored in the same partition as the root directory (I).
With a Windows-based server, what happens when the c: drive runs out of space? Bad things. We all know that bad things happen when the c: drive of a Windows computer runs out of space. So, Windows administrators create additional partitions (D:, E:) to prevent the c: drive from filling up. The same is true for VMware ESX. Of course, ESX, as noted earlier, doesn't use drive letters. Instead, everything hangs off the root (I) directory. Like Windows, if the root (I) partition runs out of space, bad things happen. So, to protect the root partition from filling up, Linux administrators create additional partitions, and they mount those partitions as directories under the root directory. Likewise, ESX administrators will create additional partitions to protect the root partition from filling up.
To protect the root partition from filling up-let's looks at the default partitions in VMware ESX:
Default VMware ESX Partition Scheme
|
Mount Point Name |
Type |
Size |
|---|---|---|
|
/boot |
Ext3 |
250MB |
|
/ |
Ext3 |
5000MB (5GB) |
|
(none) |
Swap |
600MB |
|
/var/log |
Ext3 |
2000MB (2GB) |
|
(none) |
Vmkcore |
100MB |
Table 1.4
THE /BOOT PARTITION
The /boot partition, as its name suggests, stores all the files necessary to boot VMware ESX. The boot partition is created by default during the installation of ESX, setting aside 250MB of space. What's interesting is that the ESX installation program does not expose the boot partition or allow the user to modify the boot partition during installation. This is a big change from previous versions of ESX. If you are interested, you can see information on the boot partition on the installation summary screen toward the end of the ESX installation. Because the user has no ability to modify the boot partition in any way, I've included it here only for the sake of completeness.
THE ROOT (/) PARTITION
The root (/) partition is the "top" of the Service Console operating system. As stated earlier, the Service Console uses a single-rooted file system where all other partitions attach to a mount point under the root partition. I have already alluded to the importance of the root of the file system and why you don't want to let the root partition run out of space. Is 5GB enough for the root partition? One might say that 5GB must be enough if that is what VMware chose as the default. The minimum size of the root partition is 2.5GB, so the default is twice the size of the minimum. So, why change the size of the root partition? Keep in mind that any directory on which another partition is not mounted is stored in the root partition. If you anticipate needing to store lots of files in the /home directory but don't create a separate partition for /home, this space comes out of the root partition.
As you can imagine, 5GB can be used rather quickly. Because resizing a partition after it has been created is difficult and error-prone, it's best to plan for future growth. To avoid this situation, you should plan for a root partition with plenty of space to grow. Many consultants often recommend that the root partition be given more than the default 5GB of space. It is not uncommon for virtualization architects to suggest root partition sizes of 20GB to 25GB. However, the most important factor is to choose a size that fits your comfort for growth and that fits into the storage available in your chosen server platform and configuration.
The SWAP partition
The swap partition, as the name suggests, is the location of the Service Console swap file. This partition defaults to 600MB. As a general rule, swap files are created with a size equal to at least two times the memory allocated to the operating system. The same holds true for VMware ESX.
The installation process allocates a default amount of 300MB of memory for the Service Console; therefore, the default swap partition size would be 600MB. It might be necessary to increase the amount of memory granted to the Service Console. This could be for any number of reasons. If additional third-party software packages are needed to run in the Service Console-perhaps to provide monitoring or management functionality-then more memory may need to be dedicated to the Service Console. The Service Console can be granted up to 800MB of memory. With 800MB as the maximum of RAM dedicated to the Service Console, the recommended swap partition size becomes 1600MB (2 x 800MB). To accommodate for the possibility that the Service Console's memory allocation may need to be increased, it's recommended to increase the size of the swap partition to 1600MB.
The /VAR/LOG partition
The /var/log partition is where the Service Console creates log files during the normal course of operation. This partition is created with a default size of 2000MB, or 2GB of space. This is typically a safe value for this partition. However, I recommend that you make a change to this default configuration. VMware ESX uses the /var directory during patch management tasks. Because the default partition is /var/log, this means that the /var partition is still under the root partition. Therefore, space consumed in /var is space consumed in root. For this reason, I recommend that you change the mount point to /var instead of /var/log and that you increase the space to a larger value like 10GB or 15GB. This alteration provides ample space for patch management without jeopardizing the root partition and still providing a dedicated partition to store log data.
The VMKCORE partition
The vmkcore partition is the dump partition where VMware ESX writes information about a system halt. We are all familiar with the infamous Windows blue screen of death (BSOD) either from experience or from the multitude of jokes that arose from the ever-so-frequent occurrences. When ESX crashes, it, like Windows, writes detailed information about the system crash. This information is written to the vmkcore partition. Unlike Windows, an ESX server system crash results in a purple screen of death (PSOD) that many administrators have never seen. Like the boot partition, the vmkcore partition is hidden from the user during the installation process and cannot be modified or changed. It's included here for the sake of completeness.
The /opt partition
The default partitions do not include the /opt partition. Like version 3.5 of VMware ESX, many additional components of vSphere install themselves into the /opt directory structure, including the vCenter Agent and the VMware HA Agent. I recommend creating an /opt partition with enough size to hold these components as well as any other third-party products that may need to be installed into the Service Console. Examples may include hardware management agents or backup agents. By creating an /opt partition and installing software into the /opt directory structure, you are further protecting the root partition from running out of space.
Virtual machine file system partition
If you're familiar with previous versions of VMware ESX, you may note that the recommended partition scheme in Table 1.4 does not include a Virtual Machine File System (VMFS) partition. This is for a very good reason. In ESX 4, the Service Console continues its evolution toward becoming completely encapsulated by the underlying hypervisor. This process started in ESX 3, when VMware removed the need to dedicate a NIC to the Service Console and allowed the Service Console to use a NIC under the control of the hypervisor. In ESX 4, that evolution continues in that users no longer set aside space for a VMFS version 3 (VMFS 3) partition along with Service Console partitions; instead, users now set aside space for Service Console partitions on a VMFS 3 partition. VMware ESX now treats all local storage as a VMFS 3 partition (or datastore). During the installation of ESX and the configuration of the Service Console partitions, users are instead carving space out of an underlying VMFS3 datastore to grant to the Service Console. Whatever is not granted to the Service Console is left in the VMFS3 partition for use by other virtual machines. This makes the Service Console much more like a virtual machine than in the past.
Installing for DVD or downloaded installer
You can either get a DVD from VMware or you can download ESX and ESXi installers from VMware site after you purchase or opt for a trial version. Checkout the step by step instructions in the VCP-410 labs and install ESX and ESXi on the servers.
If you just want to checkout ESX and ESXi, you can opt for VMware workstation and install it as a virtual machine. It is easier to do this if you just want to checkout the features. In fact, the whole VMware vSphere 4 can be installed on virtual machines provided you have a good PC!
Despite the ease with which ESX can be installed, it is still not preferable to perform manual, attended installations of a bulk number of servers. Nor is it preferable to perform manual, attended installation in environments that are rapidly deploying new ESX hosts. To support large numbers or rapid-deployment scenarios, ESX can be installed in an unattended fashion.
Performing an Unattended ESX Installation
Unattended ESX installations help speed the installation process and help ensure consistency in the configuration of multiple servers, a key factor in helping to ensure stability and functionality in an ESX server farm.
The unattended installation procedure involves booting the computer, reading the installation files, and reading the unattended installation script. The destination host can be booted from a DVD, a floppy, or a Preboot Execution Environment (PXE) boot server and then directed to the location of the installation files and answer files. The installation files and/or answer script can be stored and accessed from any of the following locations:
• AnHTTPURL
• An NFS export
• An FTP directory
• A DVD (install files only)
|
Unattended Installation Methods |
|||
|---|---|---|---|
|
If the Computer BOOTS FROM... |
And the Media Is STORED ON A... |
And the Answer File Is stored on a... |
Then the Boot OPTION IS... |
|
PXE |
(Media) URL |
(Answer) URL |
esx ks=<answer JRL> method=<media URL> ksdevice=<NIC> |
|
CD |
CD |
URL |
esx ks=<answer JRL> ksdevice=<NIC> |
Regardless of the method used to access the installation files or the answer file, one of the first tasks that you must accomplish is creating the answer file, known as a kickstart file. The kickstart file derives its name from the Red Hat Linux kickstart file, which is used to automate the installation of Red Hat Linux. Although the ESX kickstart file uses some of the same commands as a Red Hat Linux kickstart file, the two formats are not compatible.
When editing kickstart files, be aware of differences between how Windows marks the end of a line and how Linux marks the end of a line. It's safe to edit kickstart files in WordPad on Windows, because WordPad will preserve the proper line endings. You should not use Notepad to edit kickstart scripts. If you use a Linux or Mac OS X system to edit the kickstart scripts, just be sure that the text editor of choice uses the correct line endings (LF instead of CR/LF). The kickstart file does help automate the installation of ESX, but the kickstart script does not provide a way of generating unique information for multiple installations. Each install will require a manually created (or adjusted) kickstart file that is specific to that installation, particularly around the configuration of static information such as IP address and hostname. A simple kickstart script can be used to perform an unattended installation when the installation files are located on a DVD. The kickstart script itself could be located on a USB key or a network URL.