Section 9.9: Configuring Disk Quotas
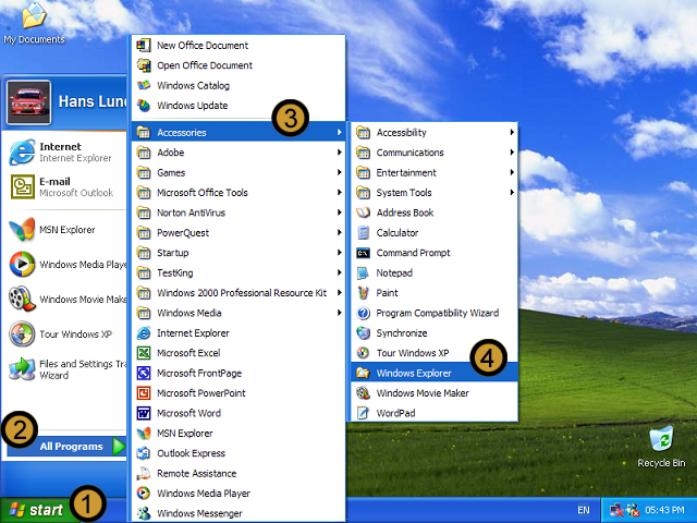
1. Click on the start button
2. Click ALL PROGRAMS
3. Point to ACCESSORIES
4. Open WINDOWS EXPLORER
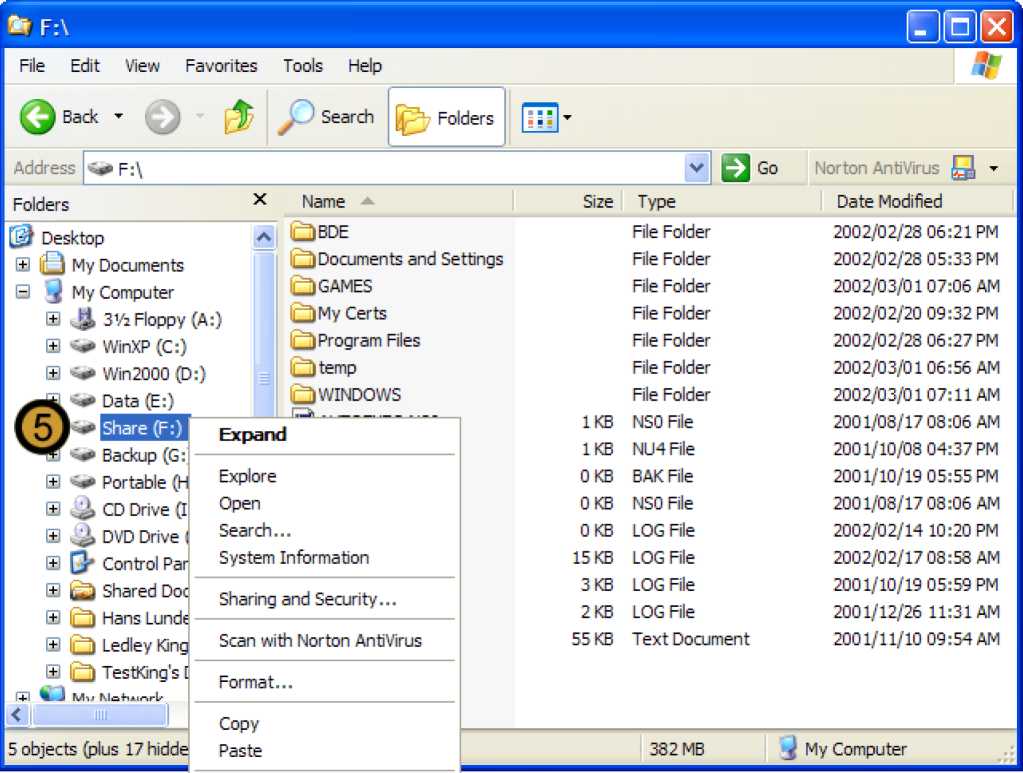
5. In WINDOWS EXPLORER, right-click the VOLUME you want to set quotas for
Note: You can only configure Disk Quotas on volumes that have been formatted with the NTFS file system
6. On the drop down menu, click properties
The volume properties dialog box appears
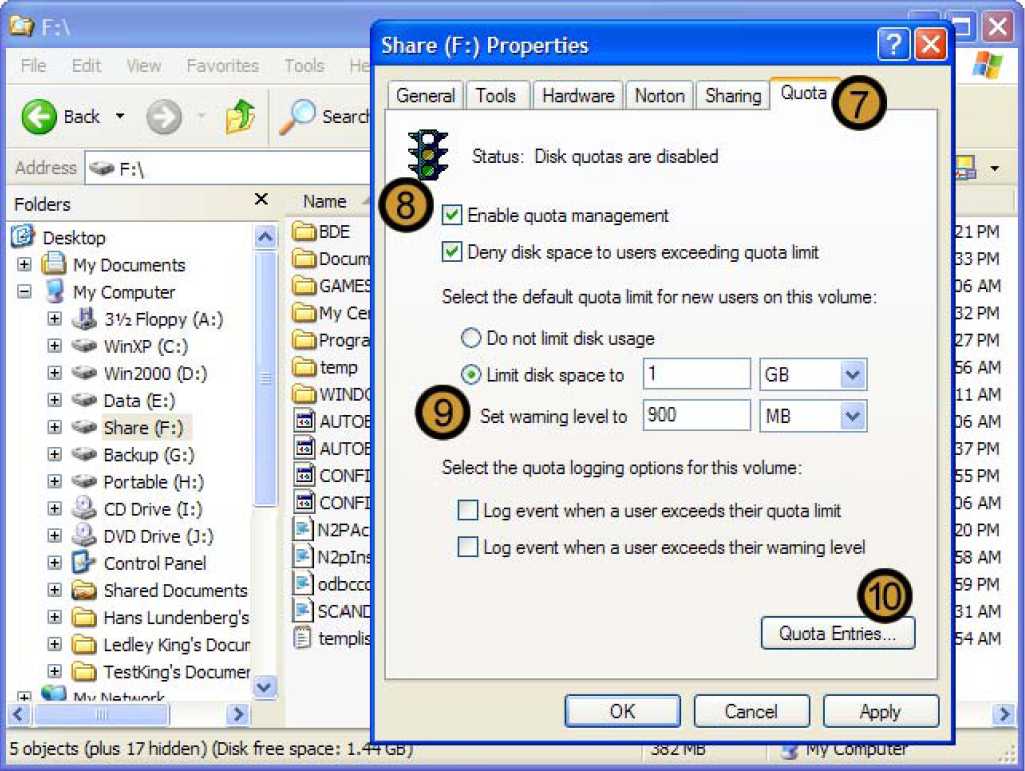
7. On the VOLUME PROPERTIES dialog box, click the quota tab
8. Select the enable quota management and deny disk space to users exceeding quota limit check boxes
9. Set the quota limit and the warning level
10. Click QUOTA ENTRIES

11. On the quota entries dialog box, click on the quota menu
12. On the drop down menu, click NEW QUOTA ENTRY ...
The select users dialog box appears
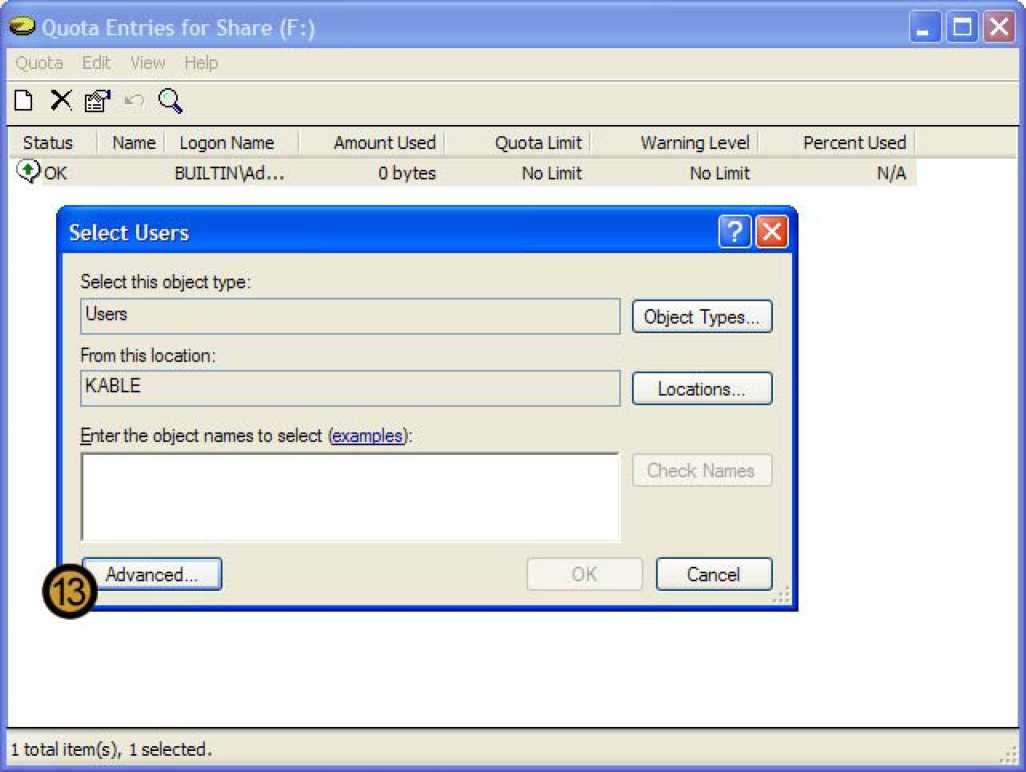
13. On the select users dialog box, click advanced
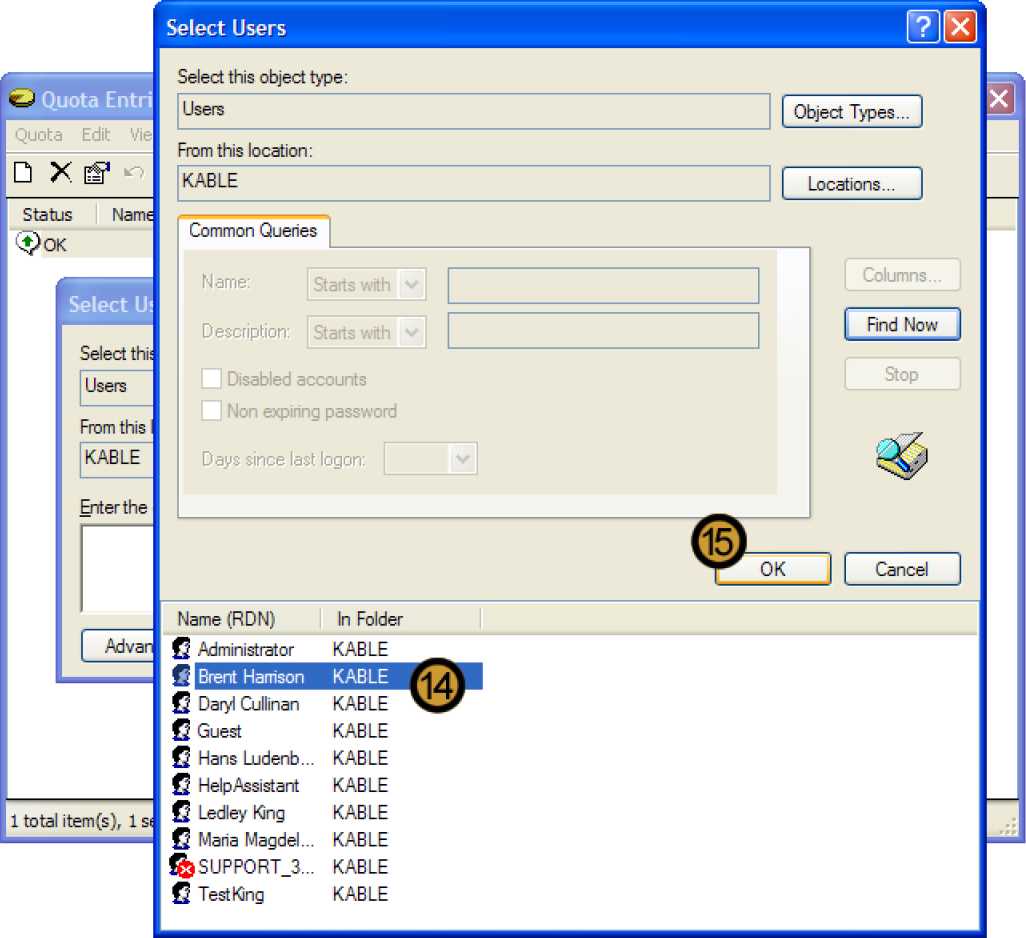
14. Select the Users whose disk usage you want to limit
Note: You can specify disk quotas on a per user per volume basis. Therefore only users are listed in the select users dialog box and not user groups.
15. Click OK
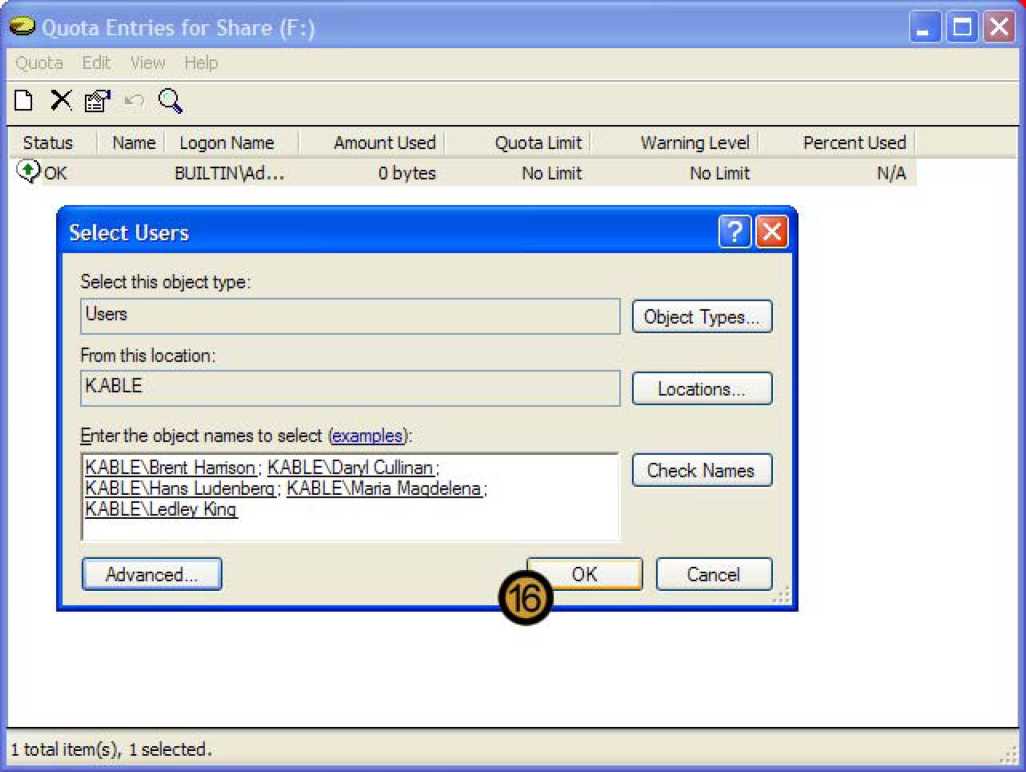
16. Once you have added all the Users whose disk usage you want to limit, click ok
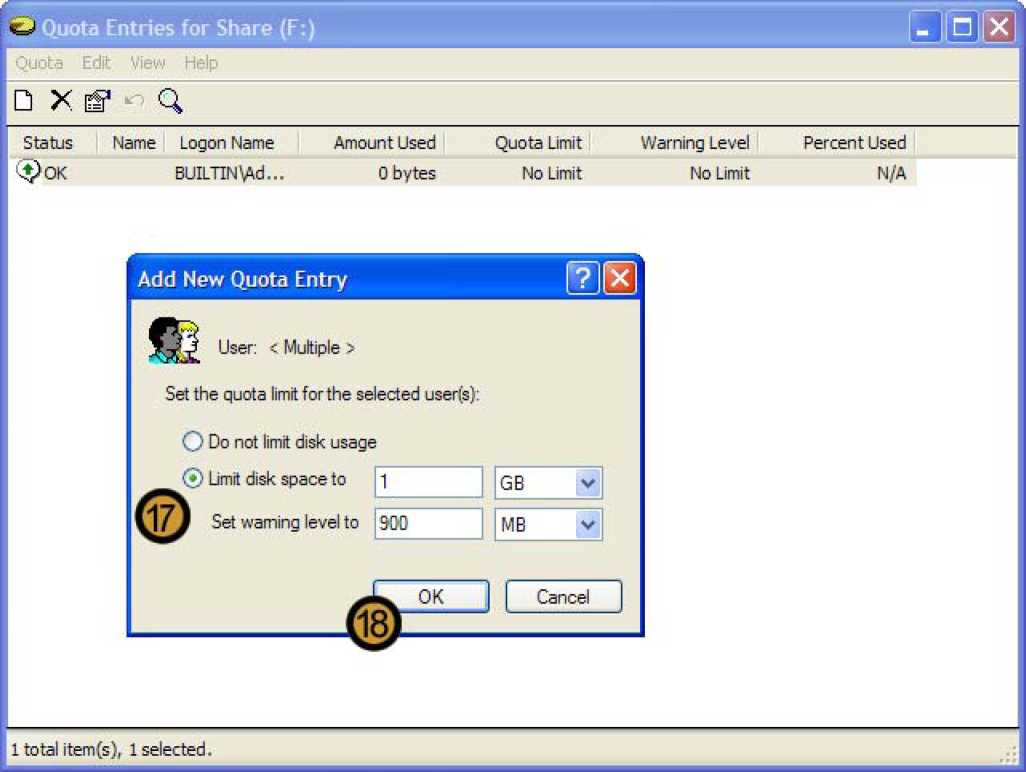
The ADD NEW QUOTA entry dialog box appears
17. On the add new quota entry dialog box, set the quota limit and the warning level
18. Click OK
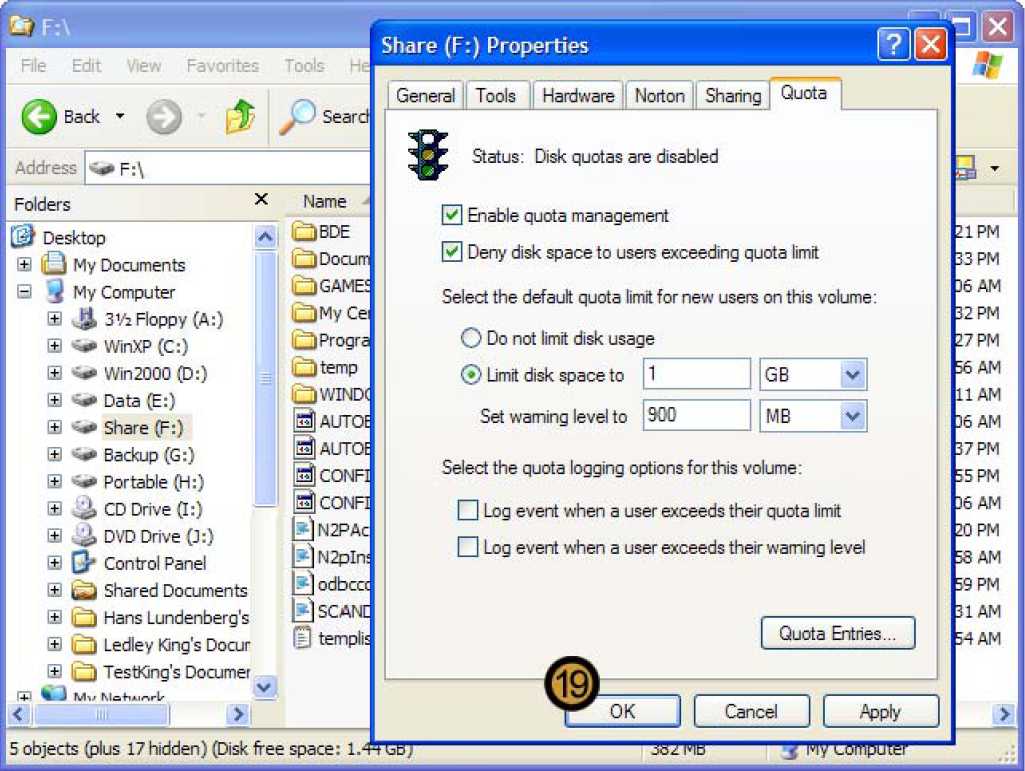
19. Click ok to close the volume properties dialog box
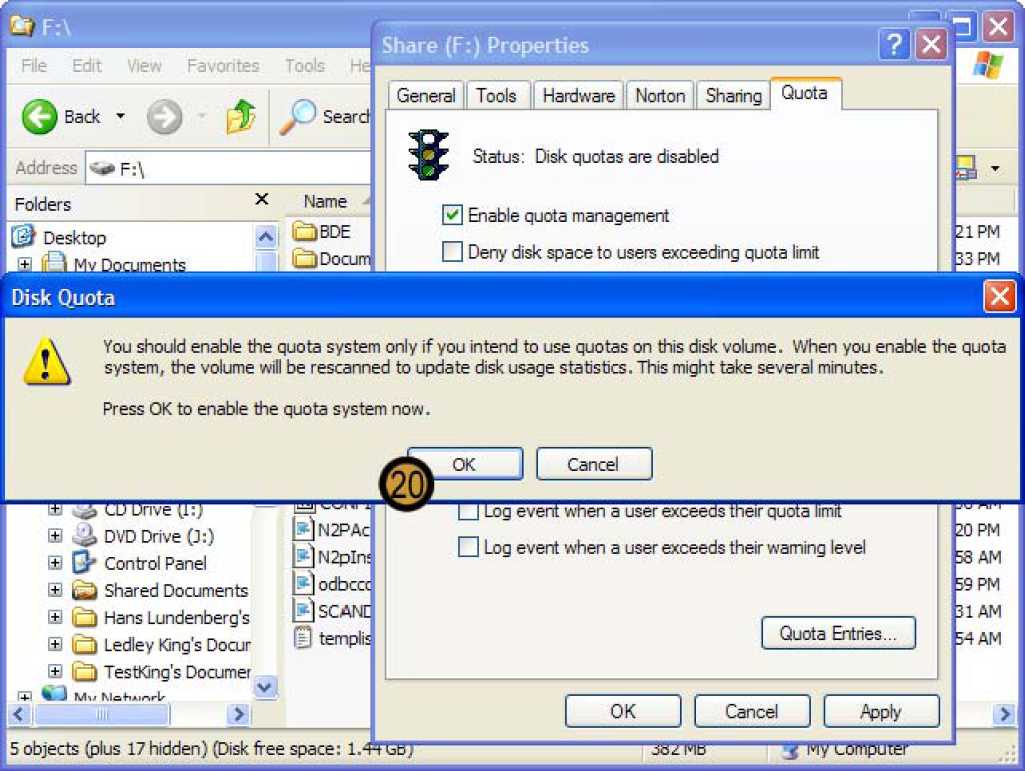
20. Click OK to confirm disk quotas