Section 9.6: Working with Device Drivers
9.6.1: Updating Device Drivers
In this lab we will be updating the Network Adapter driver with a driver that has been downloaded from the internet
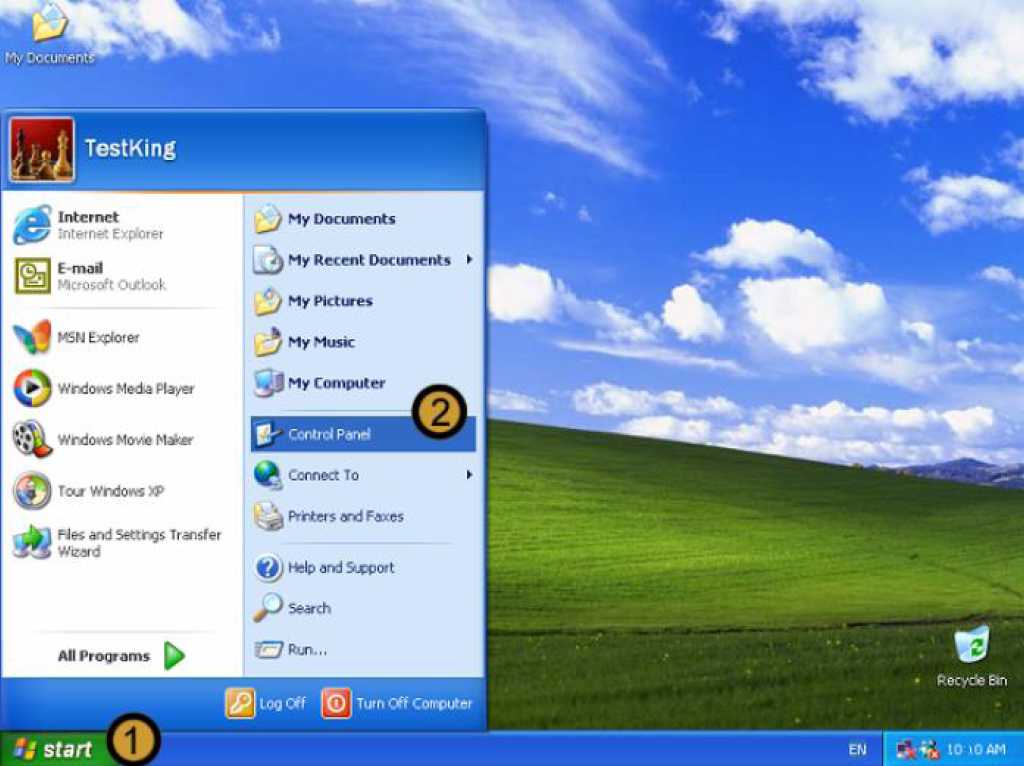
1. Click on the start button
2. Click on Control Panel
The Control Panel appears
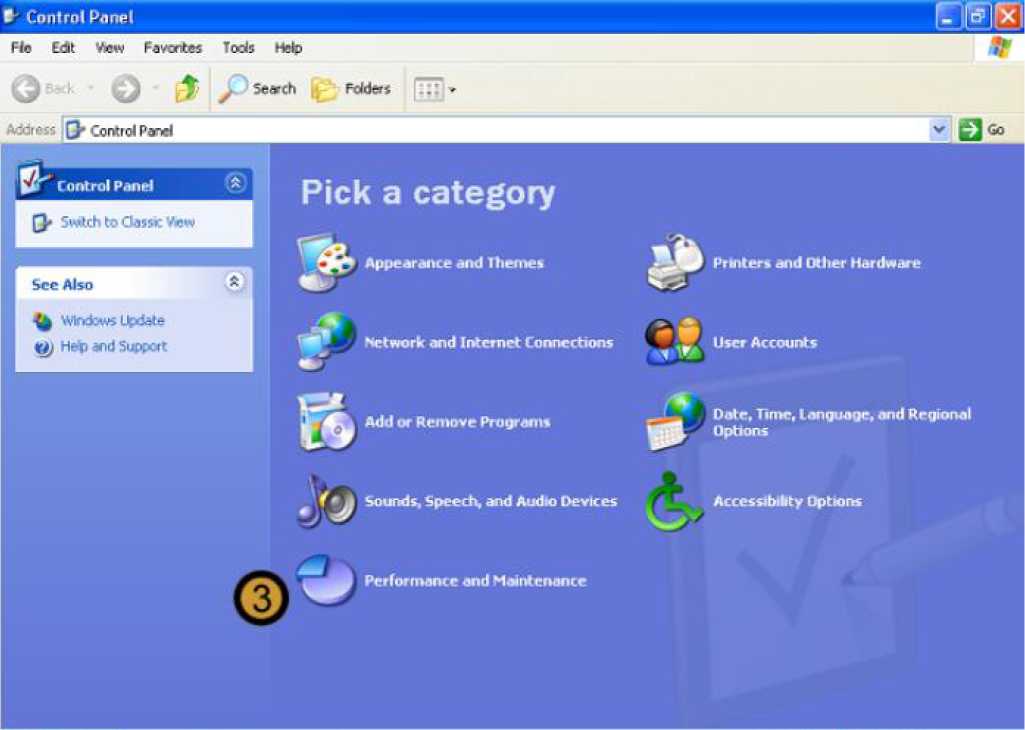
3. In the CONTROL PANEL, click on the PERFORMANCE AND MAINTENANCE icon
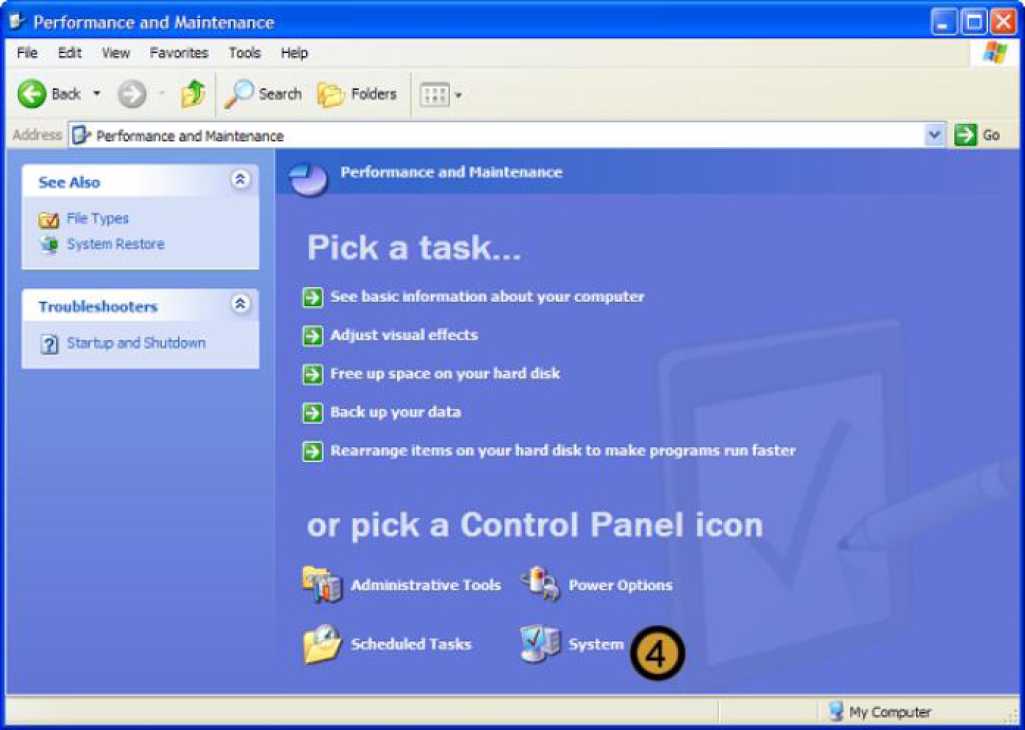
4. In PERFORMANCE AND MAINTENANCE, click SYSTEM
The system properties dialog box appears
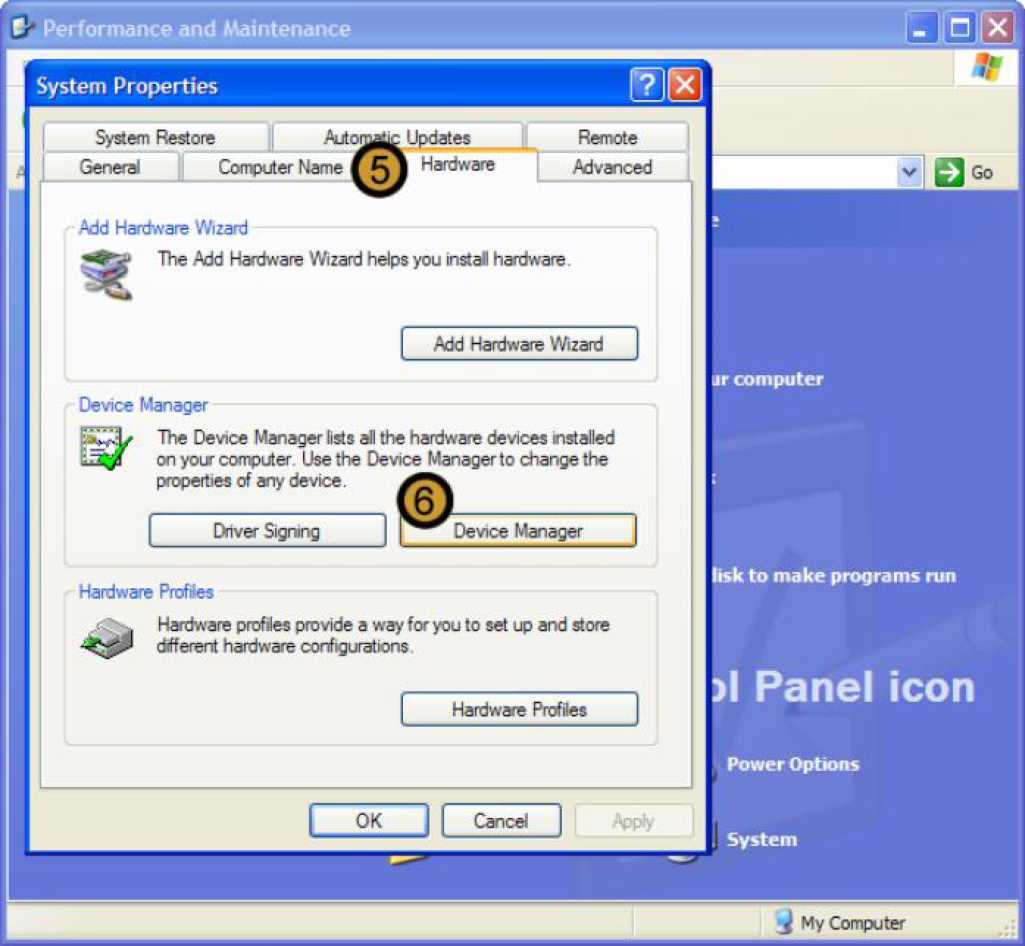
5. In system properties dialog box, click on the hardware tab
6. In the DEVICE MANAGER section, click DEVICE MANAGER
The DEVICE MANANGER appears
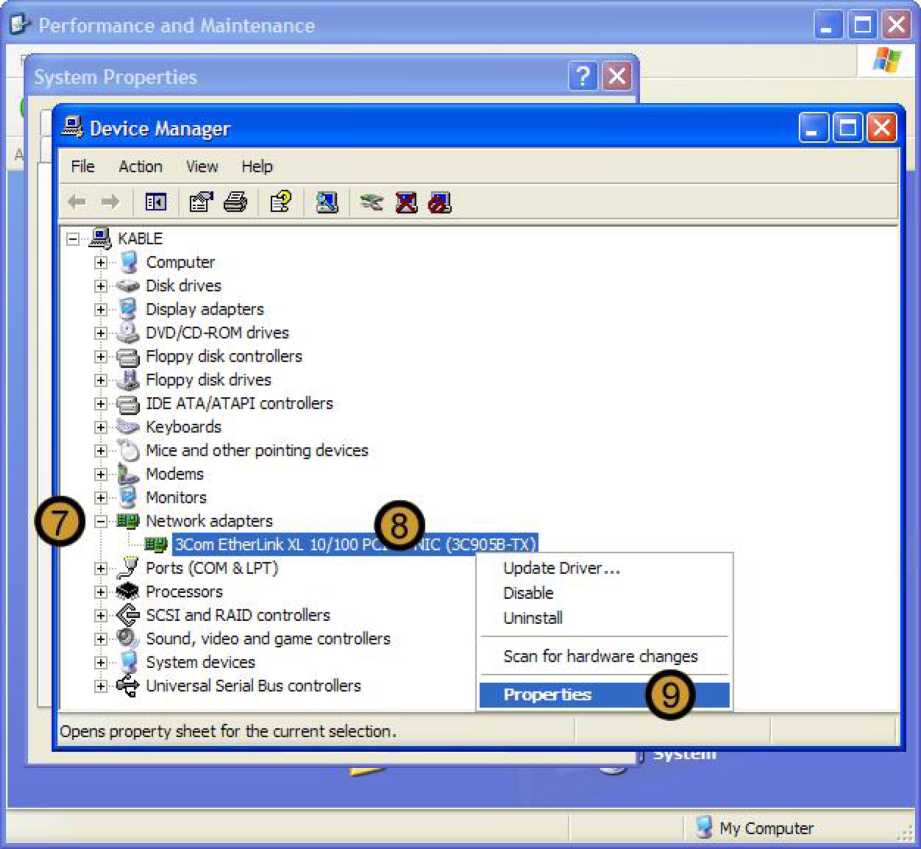
7. In device manager, expand the Hardware Type of the hardware that you want to update
8. Right-click on the Hardware device that you want to upgrade
9. On the drop down menu that appears, click properties
The device properties dialog box appears
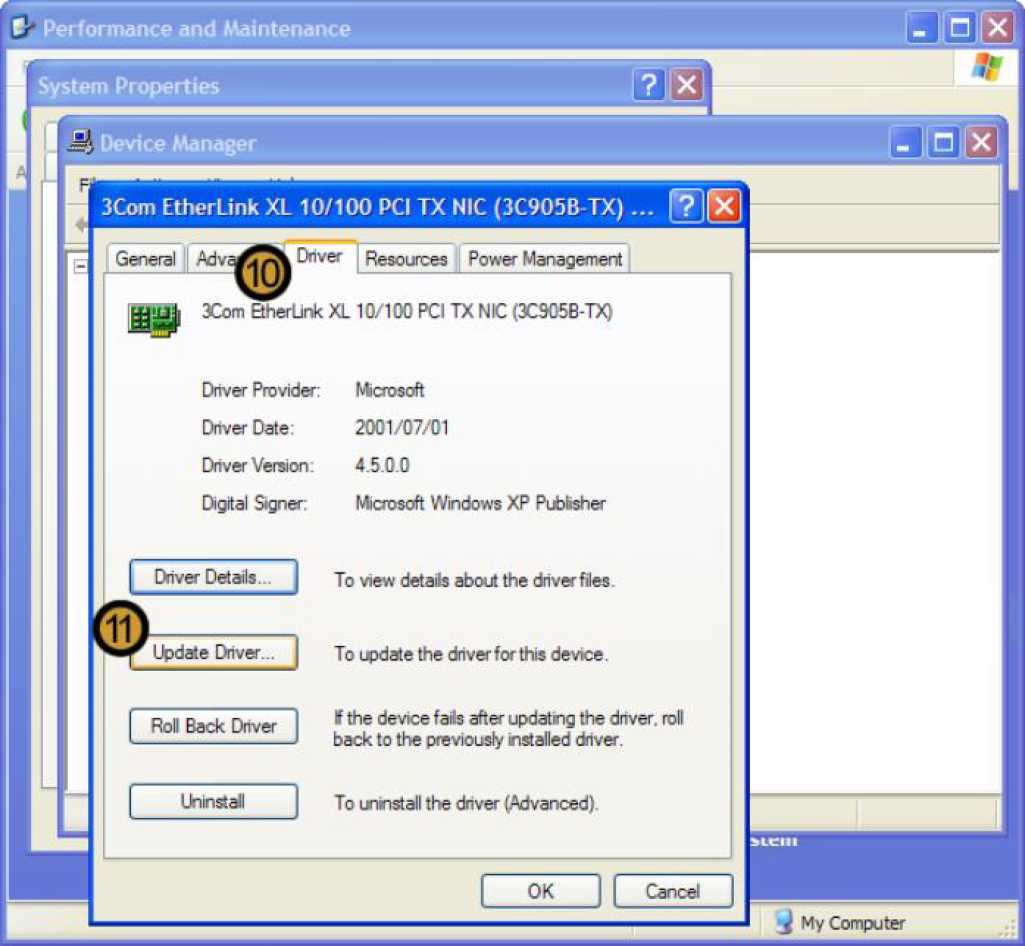
10. On the specified device properties dialog box, click on the driver tab
11. Click UPDATE DRIVER
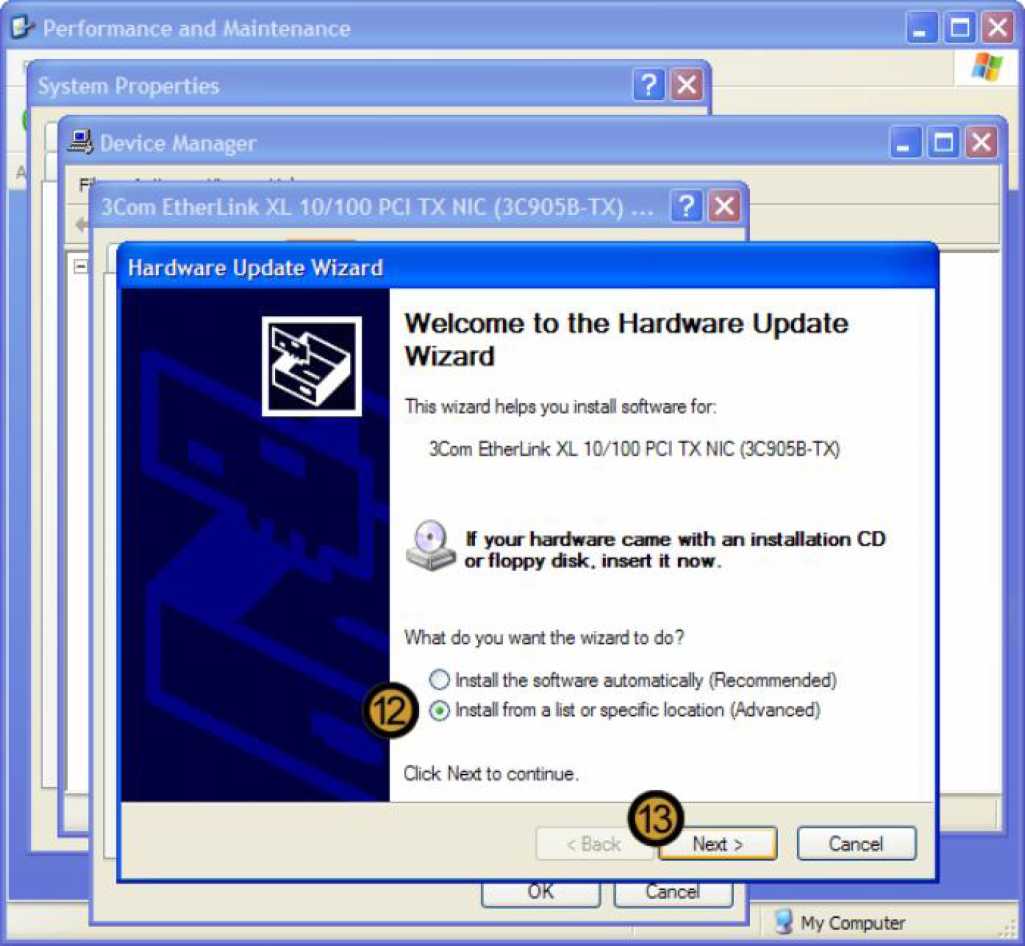
The hardware update WIZARD appears
12. On HARDWARE UPDATE WIZARD, select the INSTALL FROM A LIST SPECIFIC LOCATION radio button
13. Click NEXT
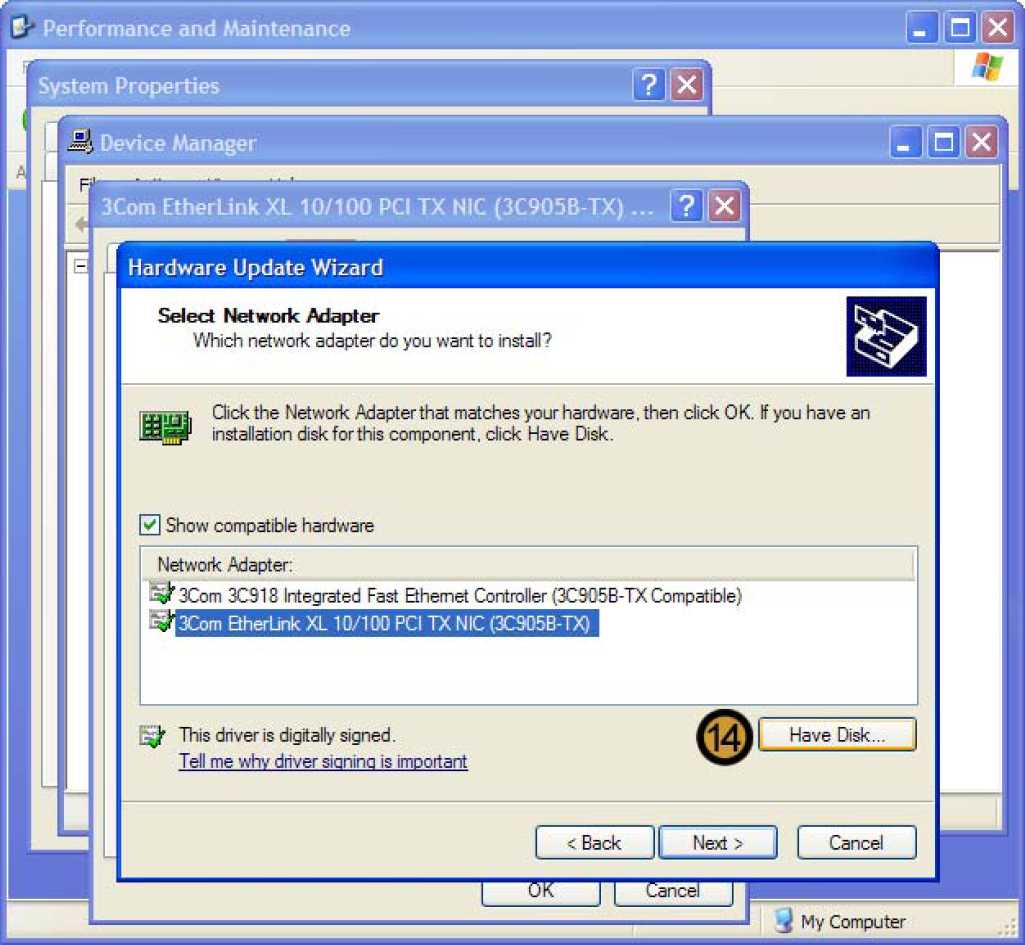
14. Click HAVE DISK ...
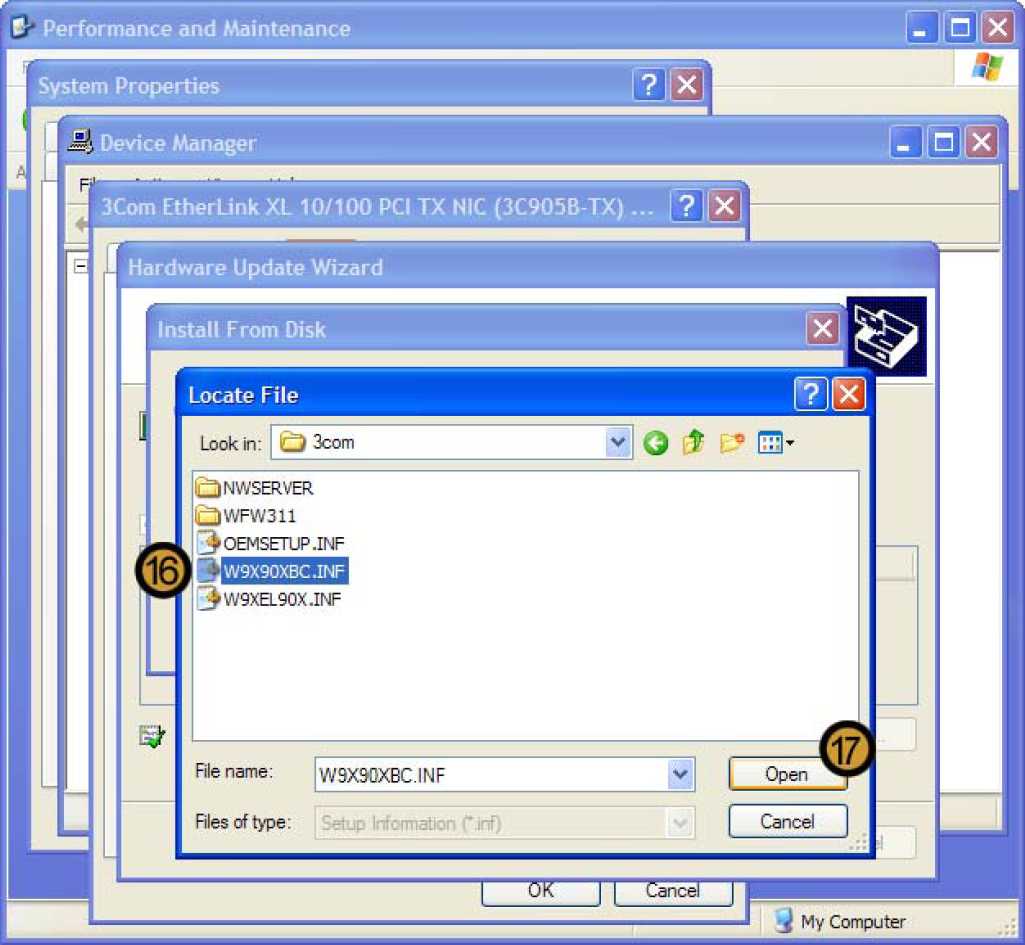
16. Locate the downloaded driver can click on it
17. Click Open
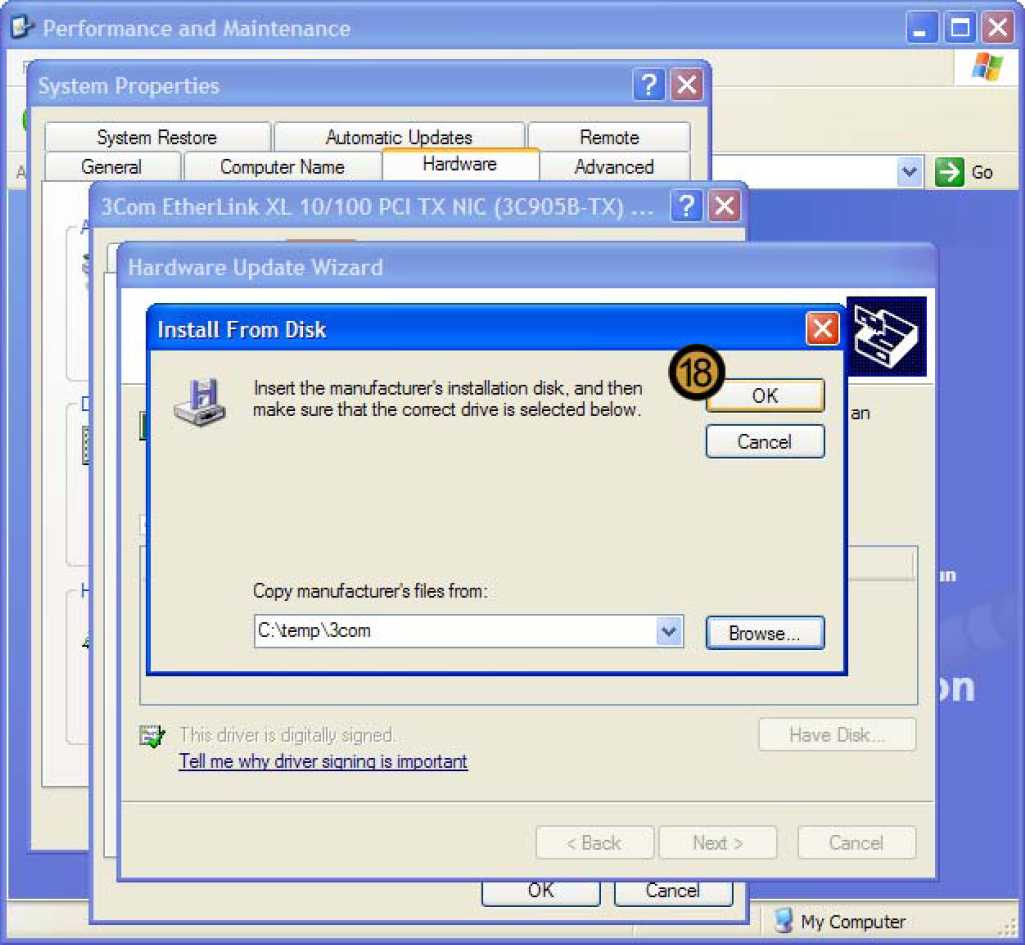
18. Click OK
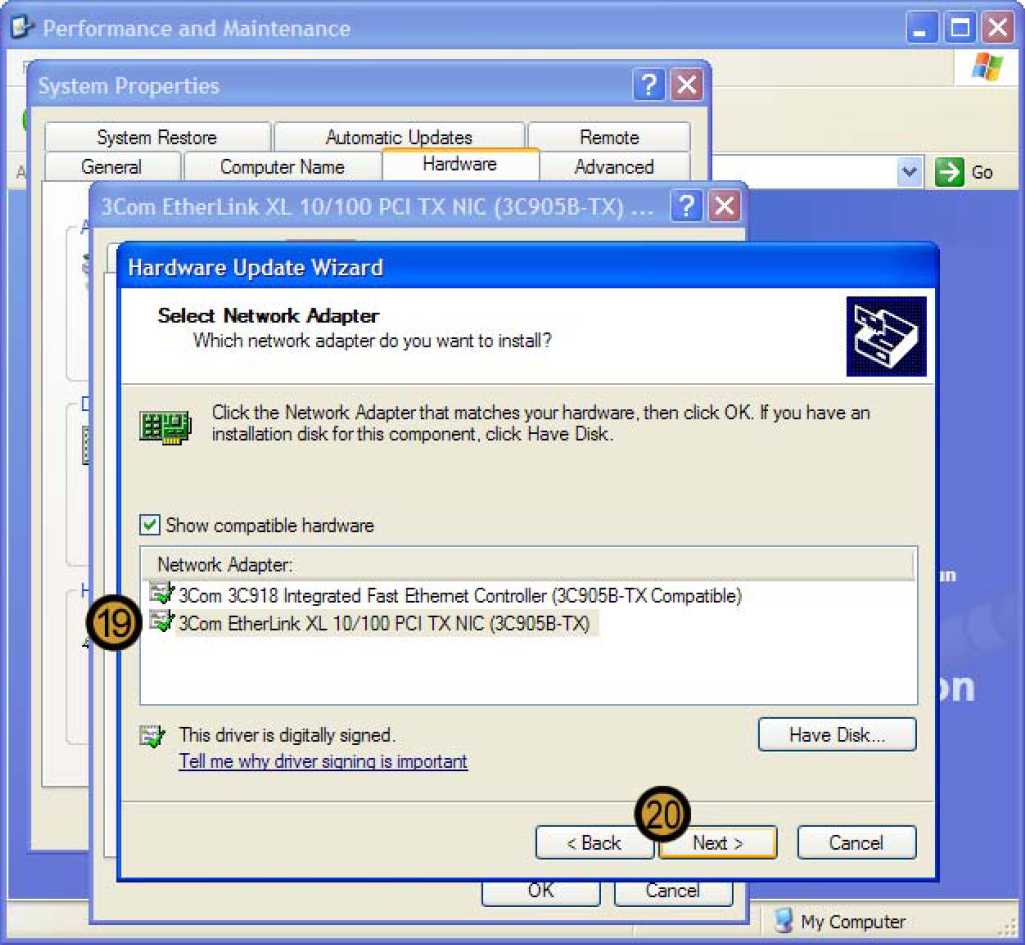
19. Ensure that the correct Device is selected
20. Click NEXT
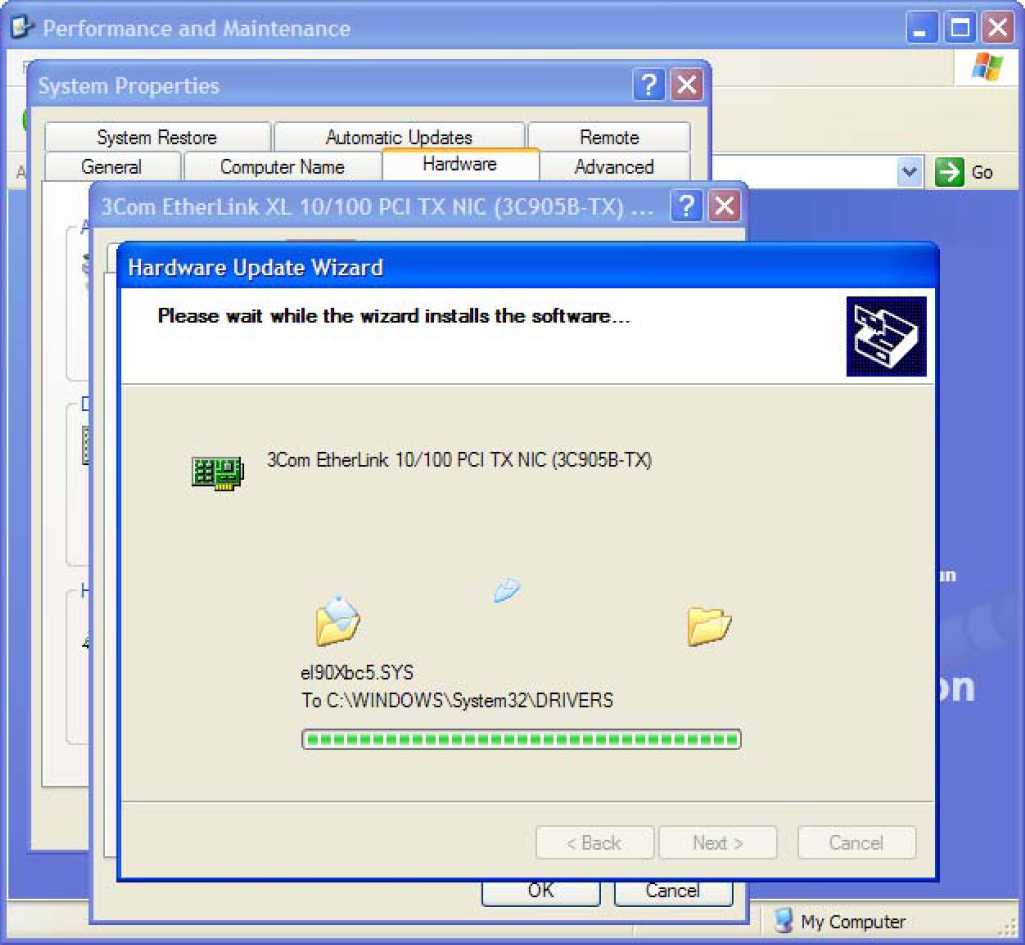
Windows XP Professional installs the new device driver
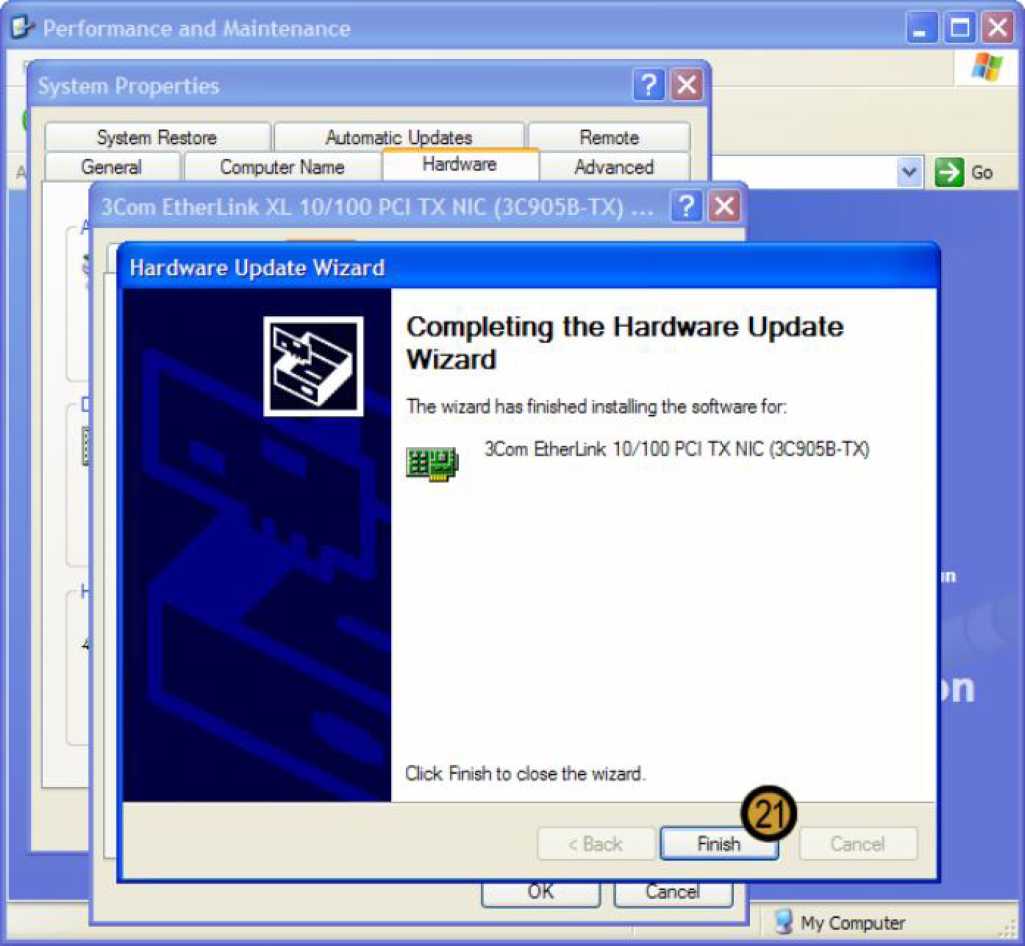
21. to complete the installation of the new device driver, click finish
9.6.2: Setting Driver Signing options
1. Click on the START button
2. Click on CONTROL PANEL
The control panel appears
3. In the CONTROL PANEL, click on the PERFORMANCE AND MAINTENANCE icon
4. In PERFORMANCE AND MAINTENANCE, click SYSTEM
The system properties dialog box appears
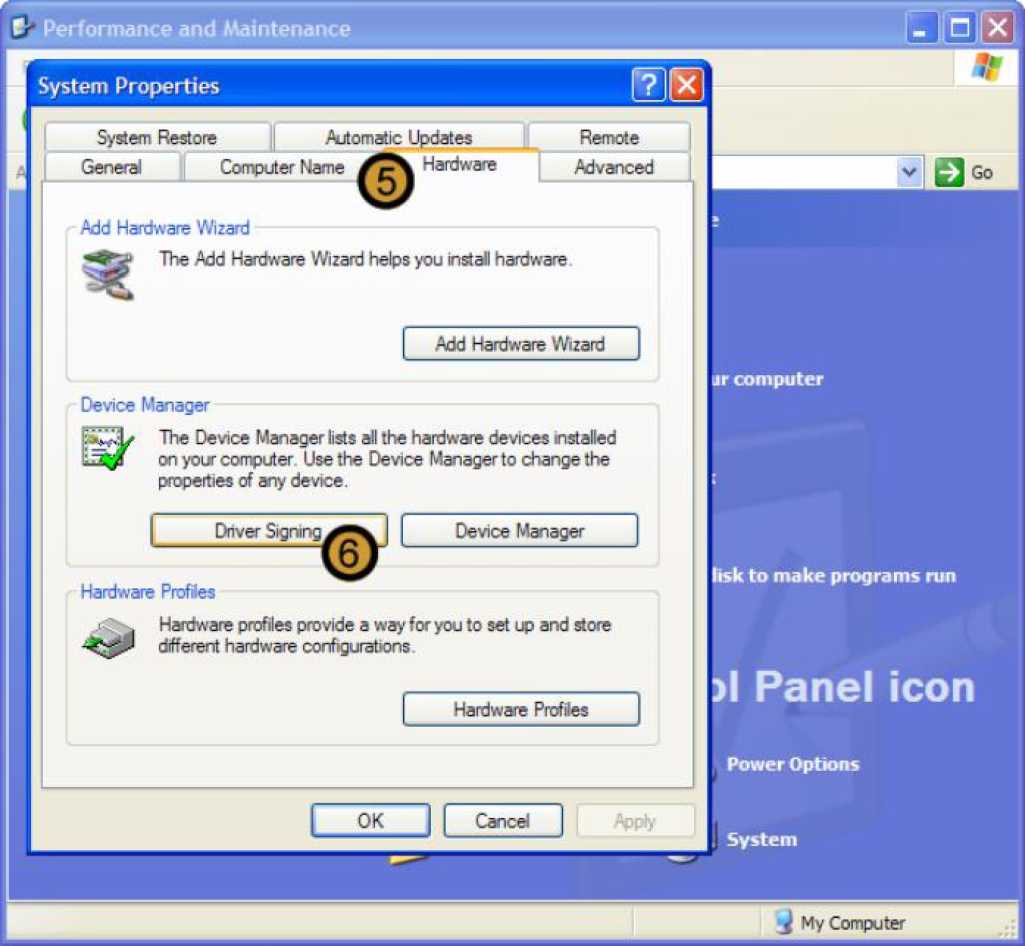
5. In system properties dialog box, click on the hardware tab
6. In the DEVICE MANAGER section, click DRIVER SIGNING
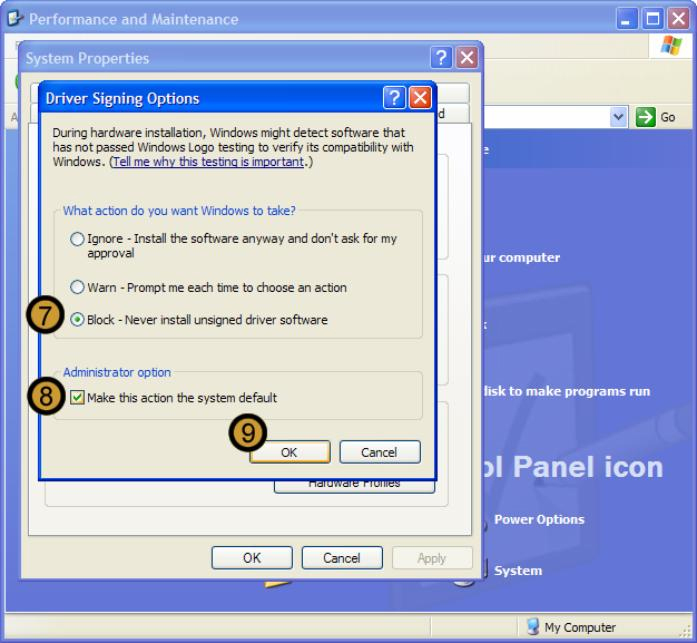
The DRIVER SIGNING options dialog box appears
7. In DRIVER SIGNING options dialog box, select the DRIVER SIGNING OPTION that you want to implement by clicking on the appropriate radio button
8. Select the make this action the system default check box
9. Click OK
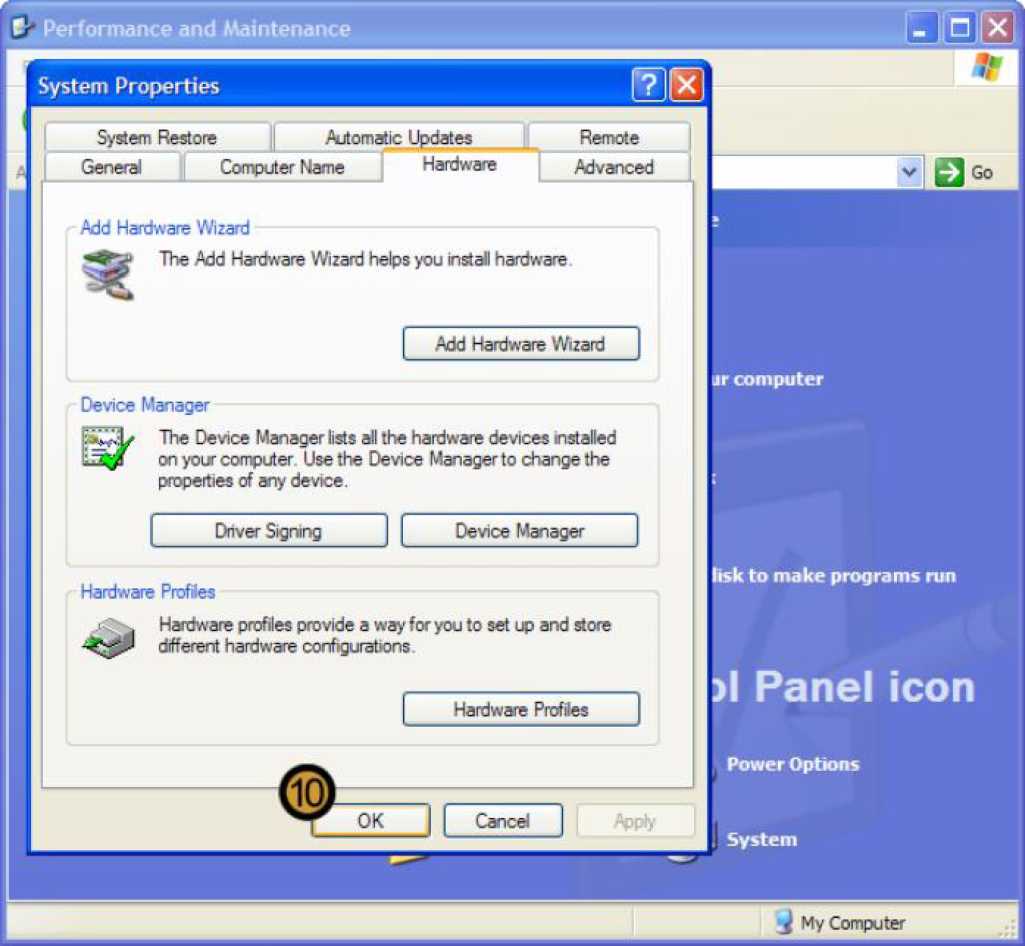
10. Close the system properties dialog box by clicking ok
9.6.3: Using Driver Roll Back
1. Click on the start button
2. Click on Control Panel
The control panel appears
3. In the CONTROL PANEL, click on the PERFORMANCE AND MAINTENANCE icon
4. In PERFORMANCE AND MAINTENANCE, click SYSTEM
The system properties dialog box appears
5. In system properties dialog box, click on the hardware tab
6. In the DEVICE MANAGER section, click DEVICE MANAGER

7. In the device manager, expand the Hardware for which you want to Rollback the driver
8. Right-click device for which you want to Rollback the driver
9. On the menu that drops down, click properties
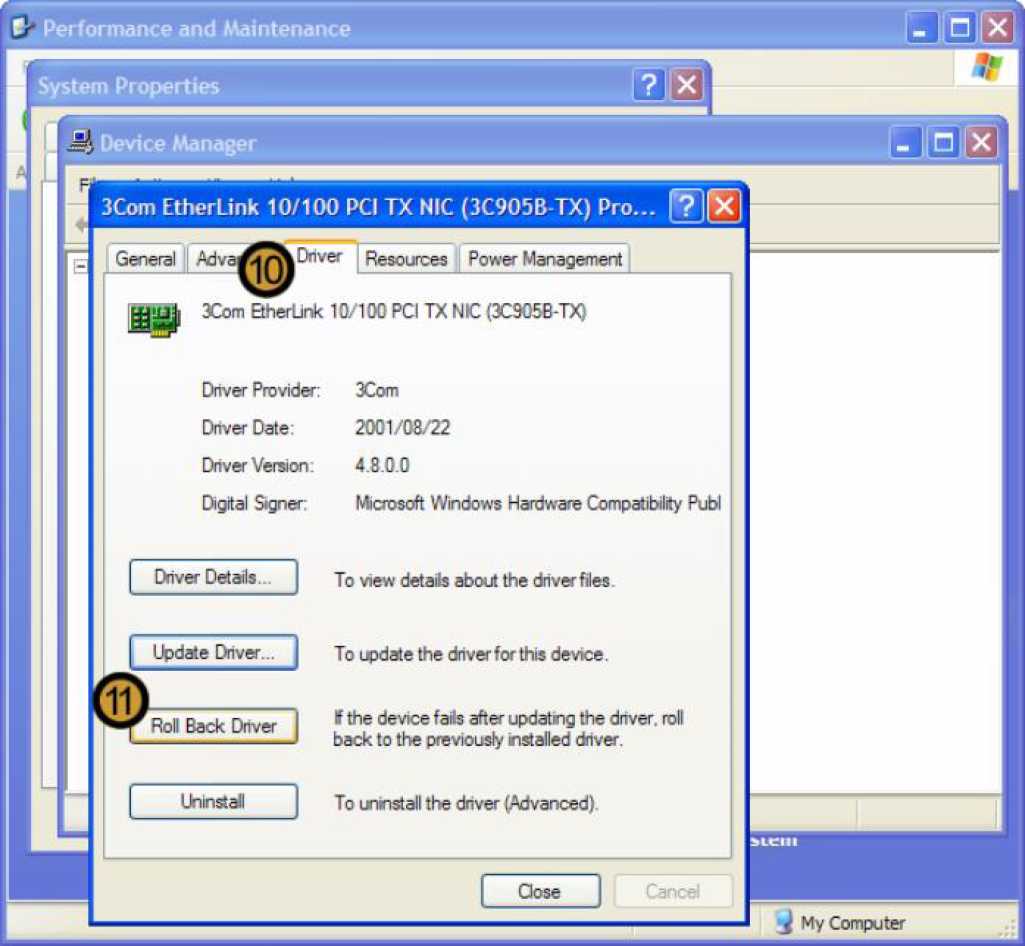
The selected device properties dialog box appears
10. On the selected DEVICE PROPERTIES dialog box, click the DRIVER tab
11. Click ROLL BACK DRIVER
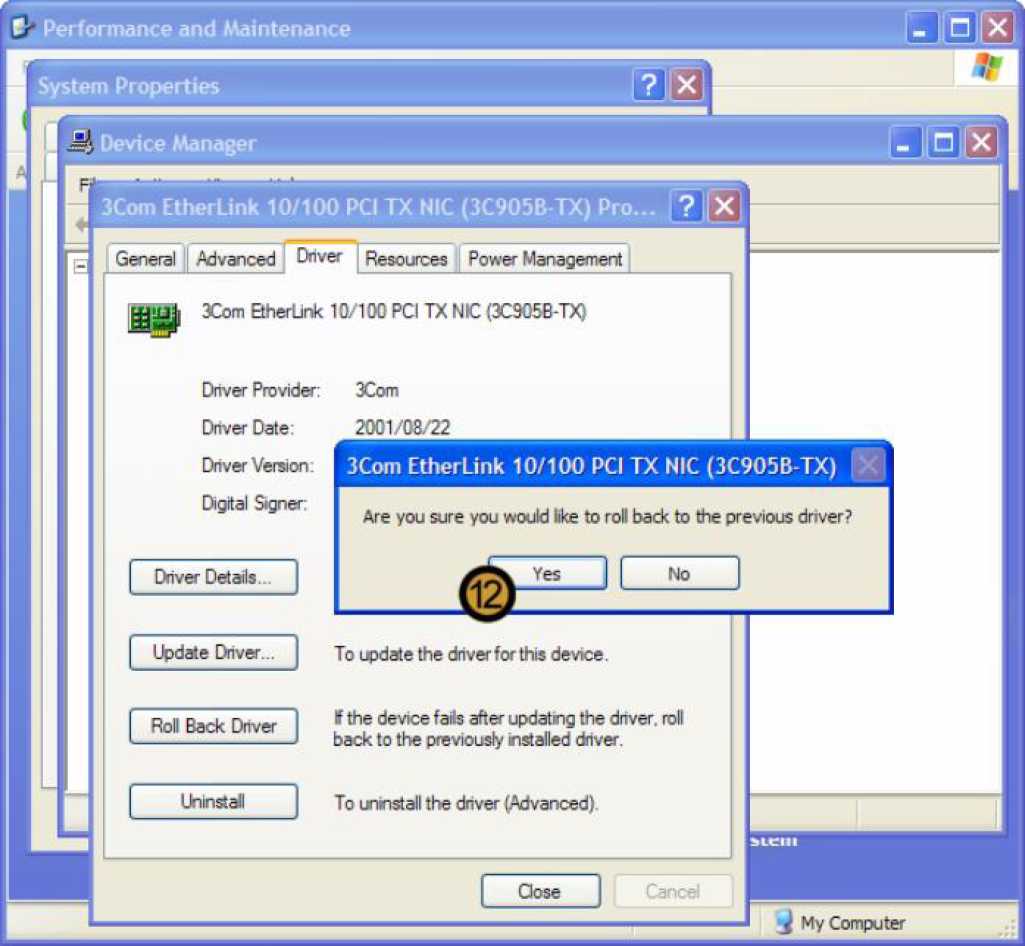
12. Confirm that you want to Roll back the device driver for the specified device by clicking YES
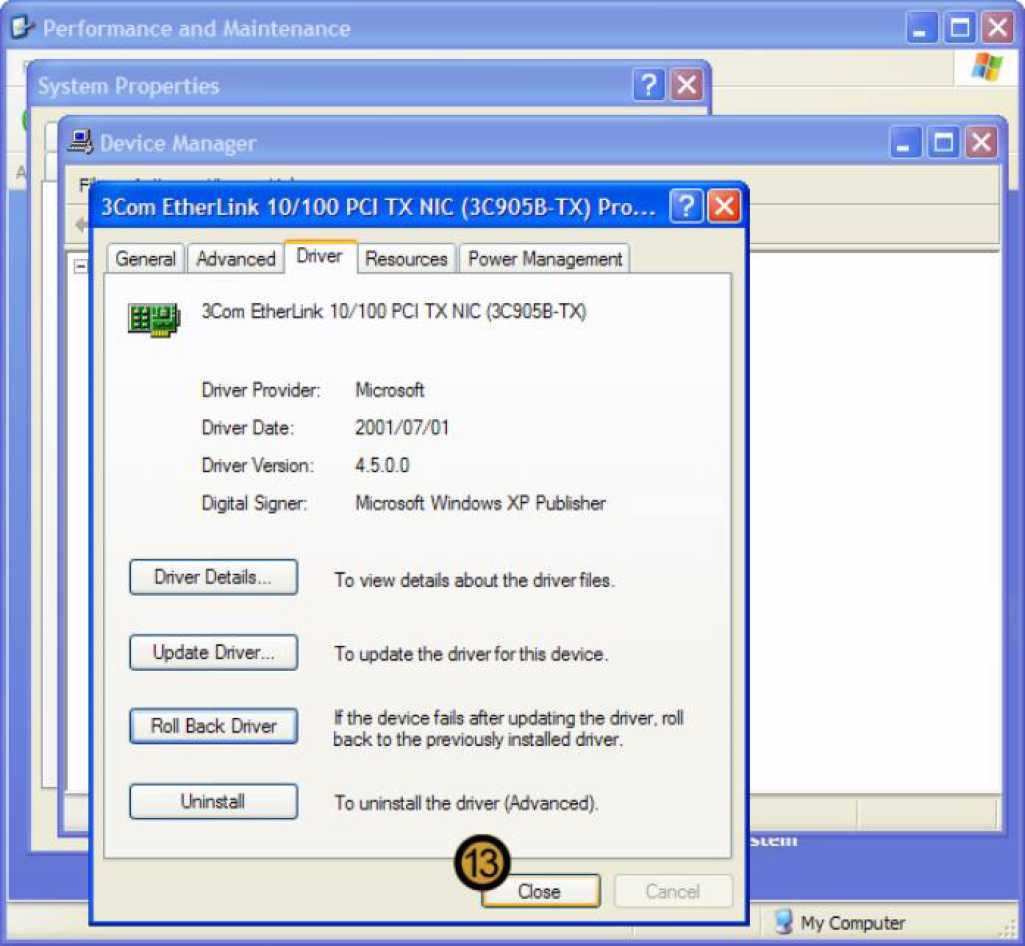
13. Close the selected device properties dialog box by clicking close