Section 6.2: Installation and Configuration
Although RRAS is fully integrated with Windows Server 2003 and installed with the default installation of Windows Server 2003, it is disabled by default. You can enable RRAS through the Routing and Remote Access Server Setup Wizard, which can be invoked through the Manage Your Server wizard or the Configure Your Server wizard. To enable Routing and Remote Access with the Manage Your Server wizard, do the following:
• Click on the START button to display the Start Menu
• On the Start Menu, click on MANAGE YOUR SERVER
• Then click the ADD OR REMOVE A ROLE link
• On the Preliminary Steps page, click next
• On the Server Role page, select remote access/vpn server
• Then click NEXT
• On the Summary of Selections page, click next to start the Routing and Remote Access Server Setup Wizard
• On the Welcome to the Routing and Remote Access Server Setup Wizard page, click Next
• On the Configuration page, select the custom configuration radio button
• Then click NEXT
• On the Custom Configuration page, select the desired services that you want to enable by selecting the appropriate check boxes as shown on Figure 6.1
• Then click NEXT
• On the Completing the Routing and Remote Access Server Setup Wizard page, click Finish
• On the message box that appears to inform you that the Routing and Remote Access service has been installed, and asking if you want to start the service, click yes
To use the Configure Your Server wizard to enable the Routing and Remote Access service, do the following:
• Click on the START button to display the Start Menu
• On the Start Menu, click on ADMINISTRATIVE TOOLS
• Then click on CONFIGURE YOUR SERVER WIZARD
• On the Welcome to the Configure Your Server Wizard page, click NEXT
• On the Preliminary Steps page, click next
• On the Server Role page, select remote access/vpn server
• Then click NEXT
• On the Summary of Selections page, click next to start the Routing and Remote Access Server Setup Wizard
• On the Welcome to the Routing and Remote Access Server Setup Wizard page, click Next
• On the Configuration page, select the custom configuration radio button
• Then click NEXT
• On the Custom Configuration page, select the desired services that you want to enable by selecting the appropriate check boxes as shown on Figure 6.1
• Then click NEXT
• On the Completing the Routing and Remote Access Server Setup Wizard page, click Finish
• On the message box that appears to inform you that the Routing and Remote Access service has been installed, and asking if you want to start the service, click yes
Note: RRAS will not function if you have enabled the Internet Connection Firewall (ICF). Therefore, the ICF must be disabled before you can enable RRAS.
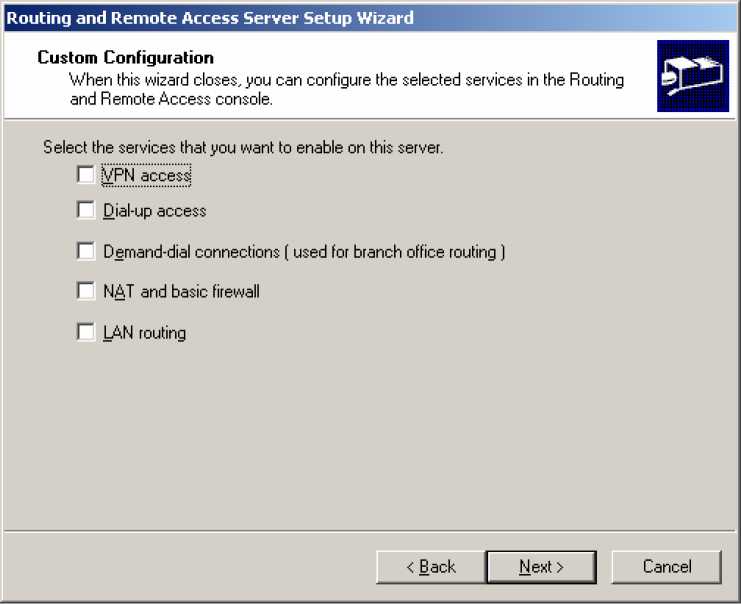
FIGURE 6.1: RRAS Custom Configuration